
The first thing you should do when you are stepping into any web development project is to create the login and signup pages — if required. Along with Nodejs, Django is famous for having a huge number of available packages and libraries due to its active community on PyPi.
The most widely used standard for the authentication purpose is OAuth 2.0. The OAuth APIs might feel difficult at first hand; that is where django-allauth comes in handy. It provides a simple yet effective way to implement authentication using OAuth 2.0 at its core. This article will tell you how you can set up basic authentication, make custom login/signup pages, and add tweaks like email authentication to your project.
Initial Setup
To get started, you need to have a basic Django web application. If you don’t have one, follow this step-by-step guide to make your first Django application. Now make sure that the sites framework is enabled in your Django application. To do that, go to settings.py and add this to your
INSTALLED_APPS:’django.contrib.sites’
Finally, run migrations after defining a site id in settings.py
SITE_ID = 1 # you can set this to any number

Getting Started with AllAuth
To configure allauth in your application, install the package by pip install django-allauth. Add the following lines in your settings.py which tell your project all the authentication methods you have integrated.
AUTHENTICATION_BACKENDS = [
‘django.contrib.auth.backends.ModelBackend’,
‘allauth.account.auth_backends.AuthenticationBackend’,
]
You can also add custom authentication in your project but let’s stick to our topic. Add the following in your INSTALLED_APPS
‘allauth’,
‘allauth.account’,
‘allauth.socialaccount’,
Then you need to add URLs for login, signup, etc. in your project urls.py file. You can either add custom URLs or use the preferred and easy way of including default allauth URLs. The allauth contains default pages that are available here. Your urls.py will look like this

Congratulations! 🙌 You are all set to test your login authentication. Go to the views.py of your application and add the login_required decorator to add the authentication layer. The views.py looks like this:

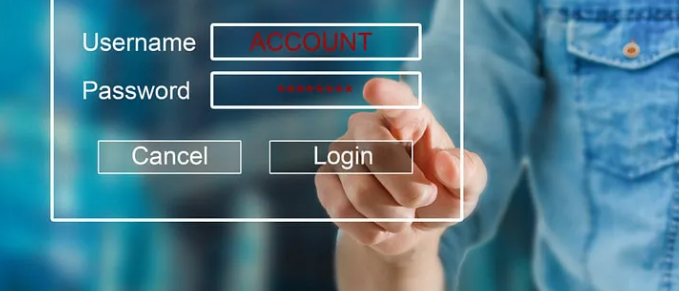
You can also make your custom decorators or even add them to urls.py. An alternative to decorators could be LoginRequiredMixin. You can also use middlewares to cater to every request. Run your application; you should see an authentication page like this

Not a fancy page, is it? No worries, we will override these templates.
Customization
The django-allauth offers a variety of customizations that you can add to meet your requirements. Let’s see what it offers!
Make Your Templates
In your project, make a templates folder and subfolder named “accounts”. Add a new file and call it “login.html” and insert this code snippet in your HTML file

You can edit this as you want and include your other HTML files. To make it more aesthetic you can integrate bootstrap and custom static files (CSS, js, etc).
Change User Model
If you want to add custom fields to your user model without worrying about authentication, you can tell Django to use your custom model instead of its default user model. Let’s see an example: Create an app called “users” and add this code to your models.py
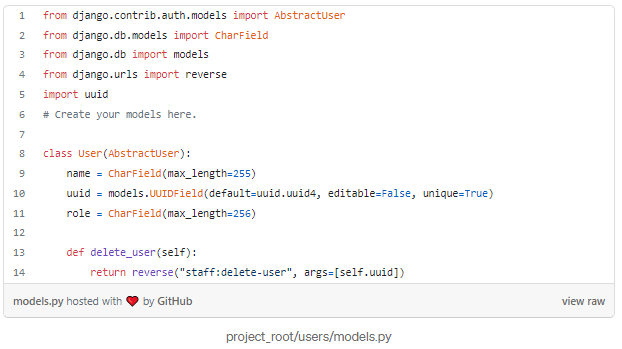
Note that you can customize this model as per your needs. After this, run these commands
py manage.py makemigrations
py manage.py migrate
Then go to your settings.py and add this line
AUTH_USER_MODEL = “users.User” # model is User from your users app
That’s it! Now Django will use your custom user model with all your custom functions in addition to the original ones.
Email Authentication
Most of the web applications require two-factor authentication with email. Traditionally, it is a pain in the ass for developers as it requires many steps such as generating a random token, creating an SMTP connection, sending the token with an appropriate message, and then verifying the token if the user clicks on the link.
With Django-allauth, it is as simple as adding these lines to your settings.py

Make sure you have this in your settings.py:

NOTE: This will only work if the SMTP server is configured with your email account. To configure your Gmail account, you need to allow less secure apps in settings:
- Sign in to Gmail
- Click here to access Less Secure App Settings in My Account.
- Next to “Allow less secure apps: OFF,” select the toggle switch to turn ON.
Now signup to your website then you should receive an email like this

Click on the link, it will redirect you to the confirmation page. You can customize almost everything from email content to the ‘redirect page’ template.
Final Words
The AllAuth features also include forgot password option, social accounts integration which includes, but is not limited to, Facebook as well as Google Authentication.
That’s all for allauth authentication. Kudos to its developers! 💚 If you are new to the software industry and you’re not sure about Django then this article has got your covered.
Resources
- https://django-allauth.readthedocs.io
- https://www.agiliq.com/blog/2019/11/django-custom-authentication-backend/
- https://medium.com/@jinkwon711/django-allauth-facebook-login-b536444cbc6b
- https://medium.com/@whizzoe/in-5-mins-set-up-google-login-to-sign-up-users-on-django-e71d5c38f5d5
- https://docs.djangoproject.com/en/3.0/intro/tutorial01/
- https://codeburst.io/ace-your-web-development-career-with-django-framework-5b66259f79d1
Liked this article? 👏 Share it in your developers’ circle. If you have any queries, drop them in the response and I will do my best to answer them.
Till we meet again!